
Overview
This guide explains how to connect the emax digital MCP server to Langdock, so you can query your Amazon analytics in natural language. There are two parts:
The emax digital MCP server gives natural-language access to your Amazon analytics from emax digital — advertising performance (SP/SB/SD/DSP), catalog metadata, performance trends, and Amazon best-practice guidance. It is multi-tenant and OAuth-secured, so each user only sees the accounts they are authorized for.
-
Admin setup (once): a Langdock admin creates a custom MCP integration and shares it with the organization.
-
Individual setup (each user): every user connects the integration to their own account and signs in with their own emax digital credentials.
Admin setup alone does not grant data access. Every user needs their own emax digital login. The permissions a user has in emax digital apply one-to-one in Langdock — nobody sees more data through Langdock than they see in the emax digital app.
Prerequisites
-
For admin setup: admin rights in your Langdock workspace.
-
For individual setup: a valid emax digital account — each user signs in with their own credentials.
Phase 1 — Admin setup
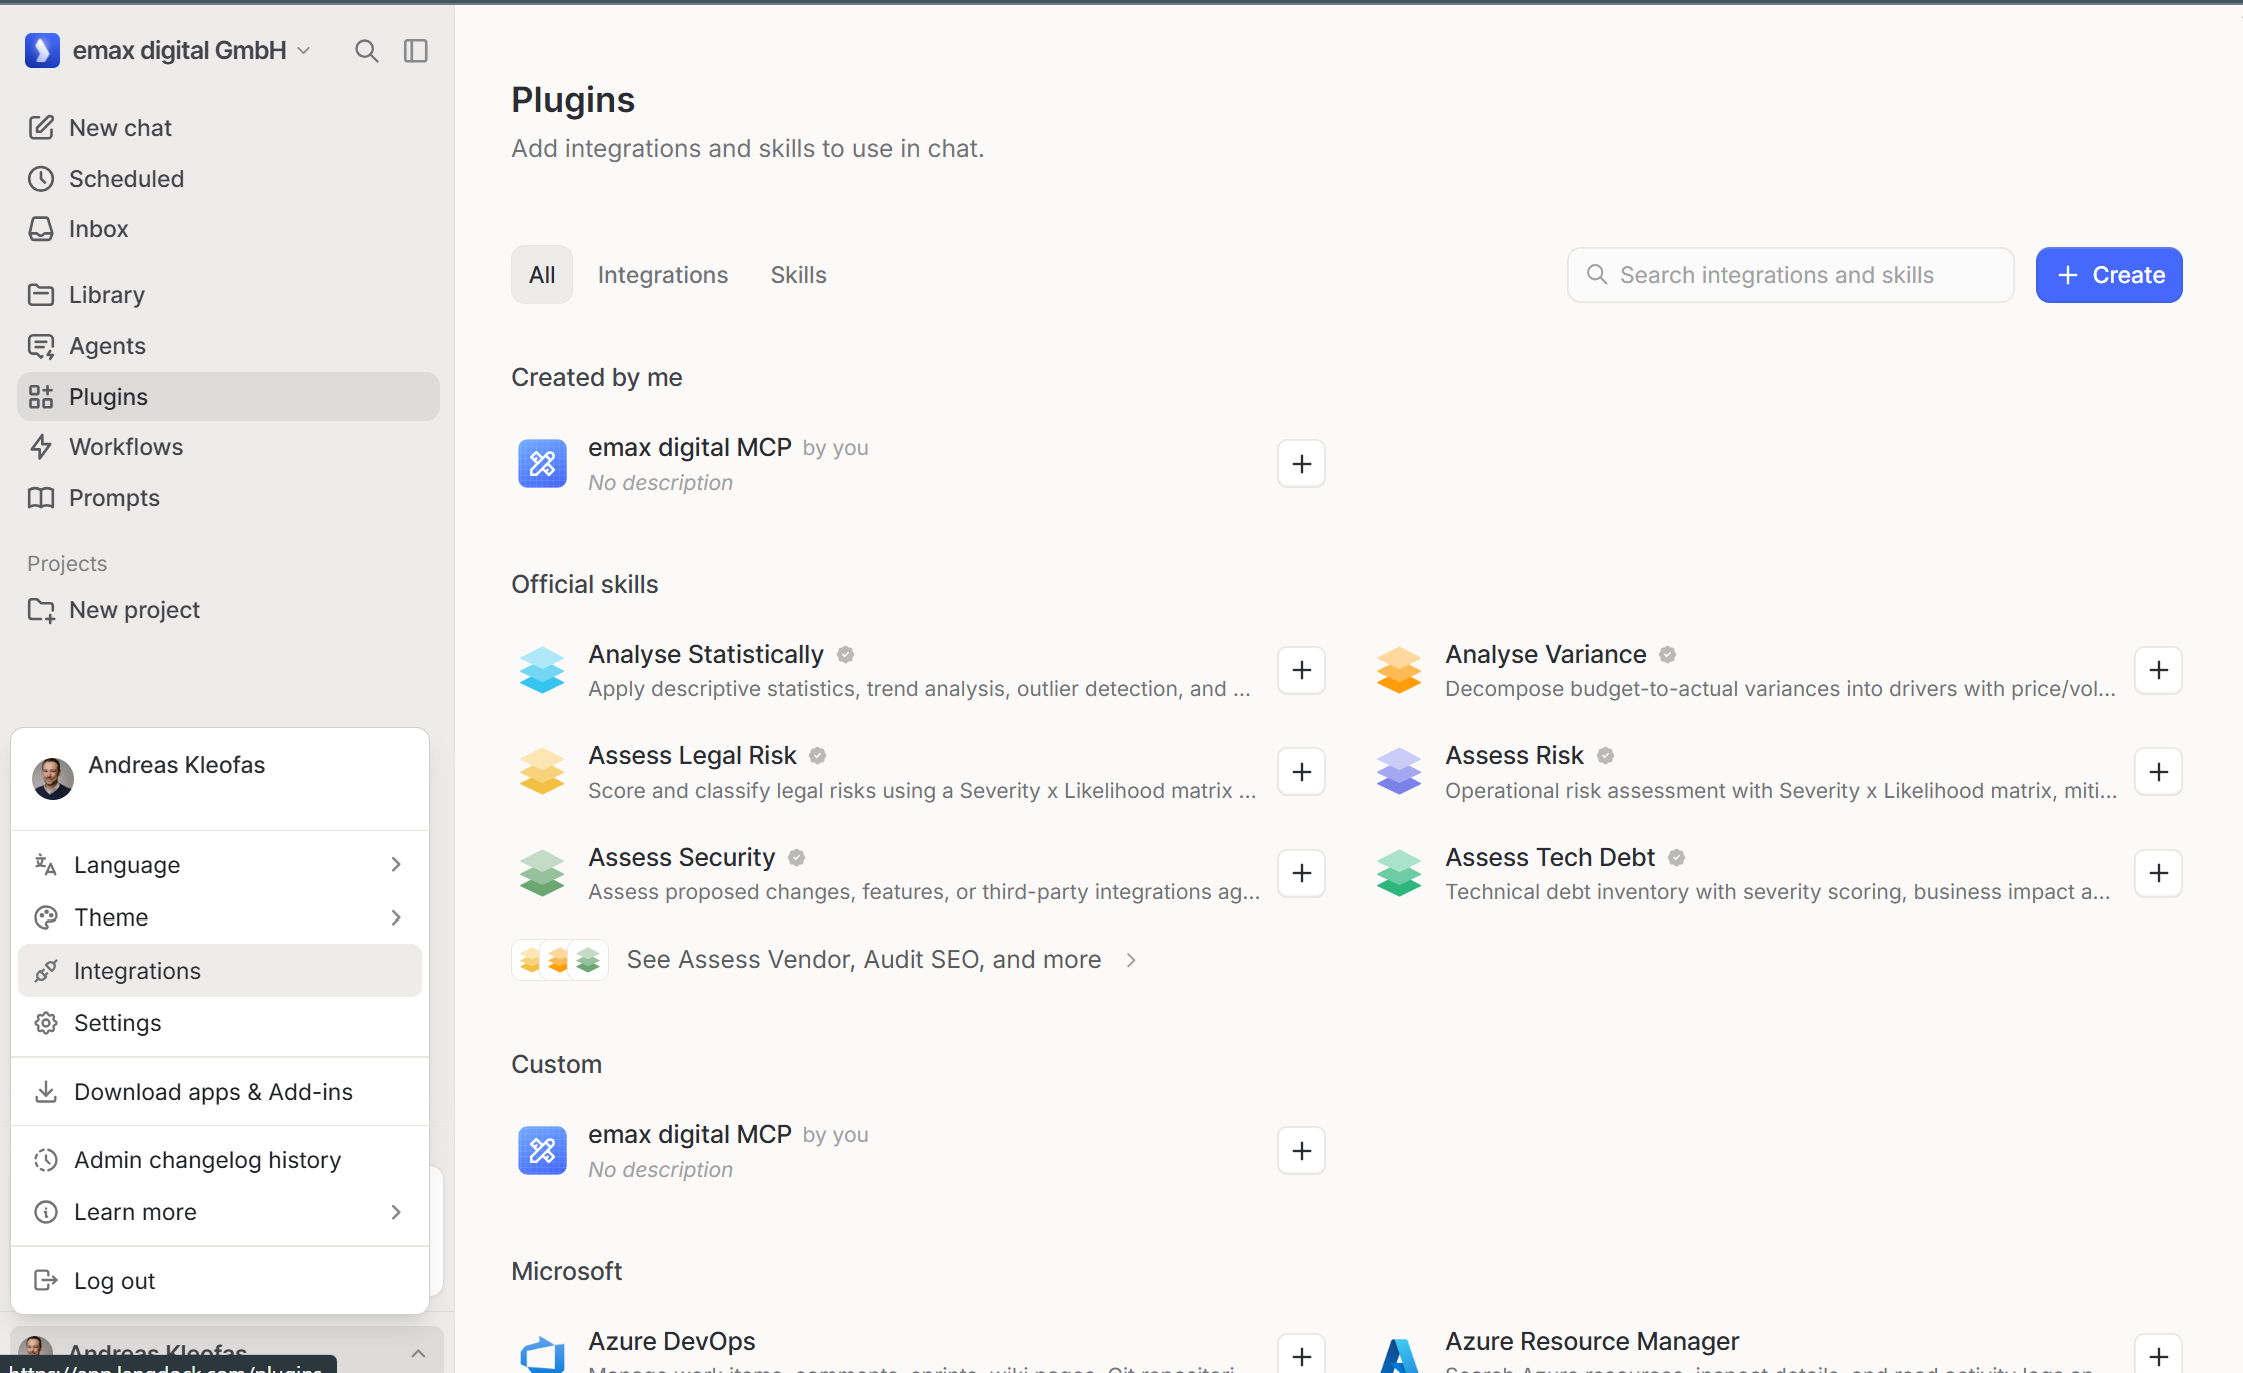
Step 1 · Open Plugins
In the Langdock sidebar, open Plugins. You can also reach this area via your profile menu → Integrations.
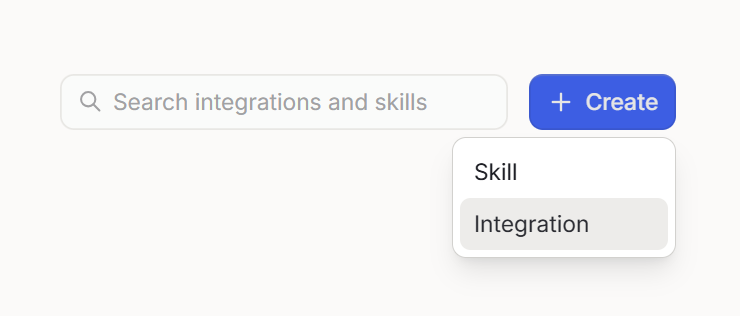
Step 2 · Create a new integration
Click + Create and choose Integration.
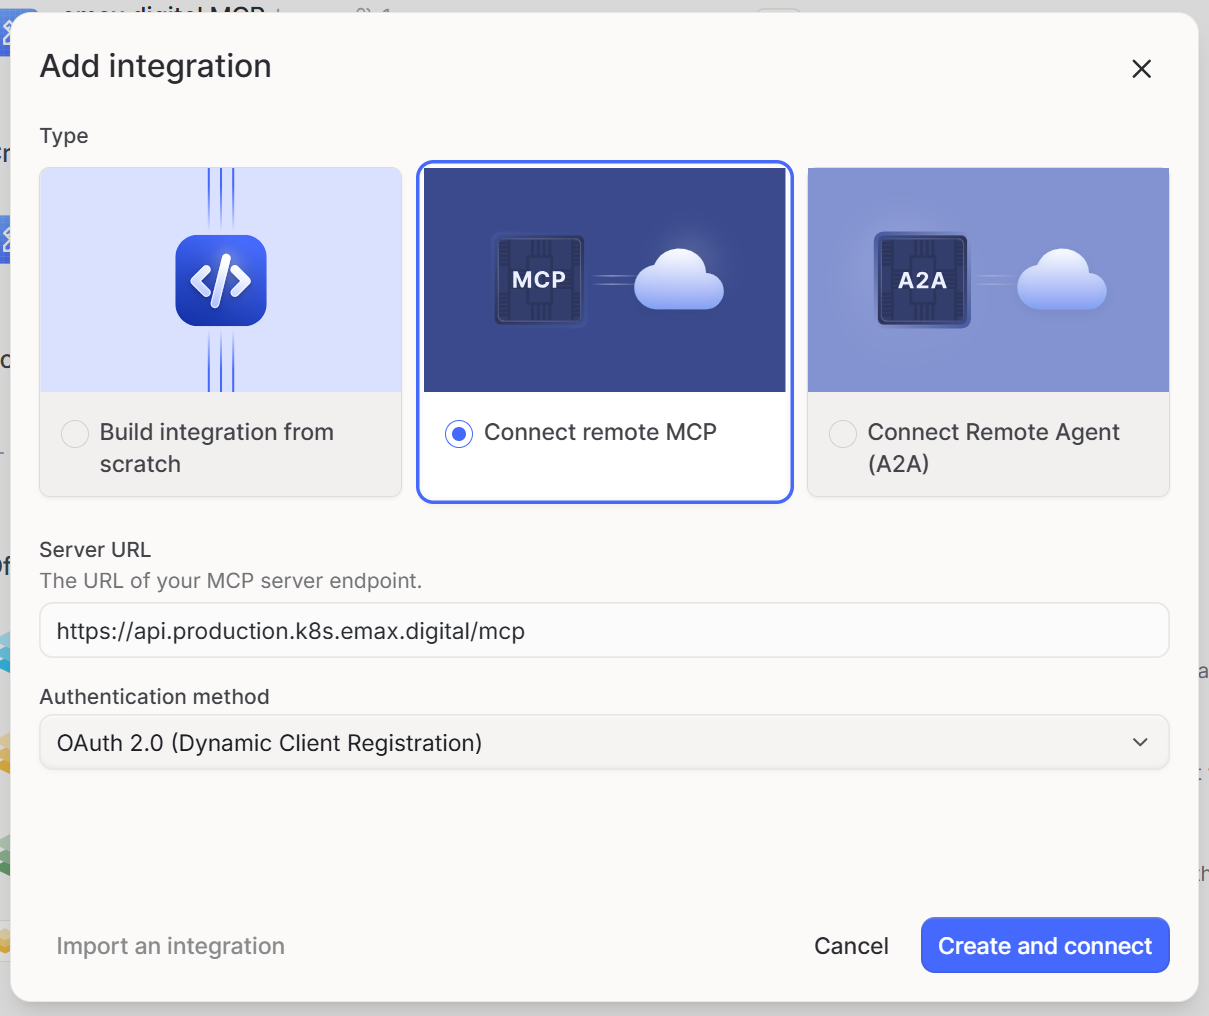
Step 3 · Configure the MCP connection
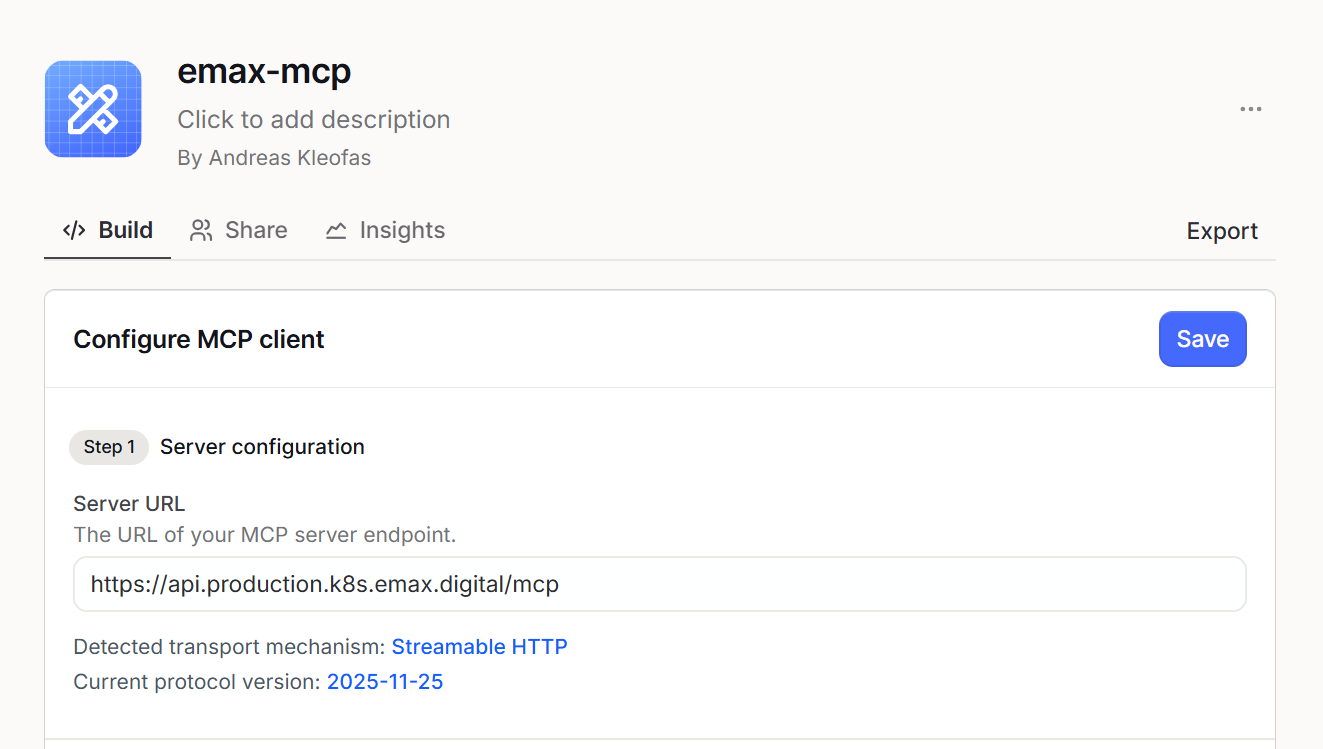
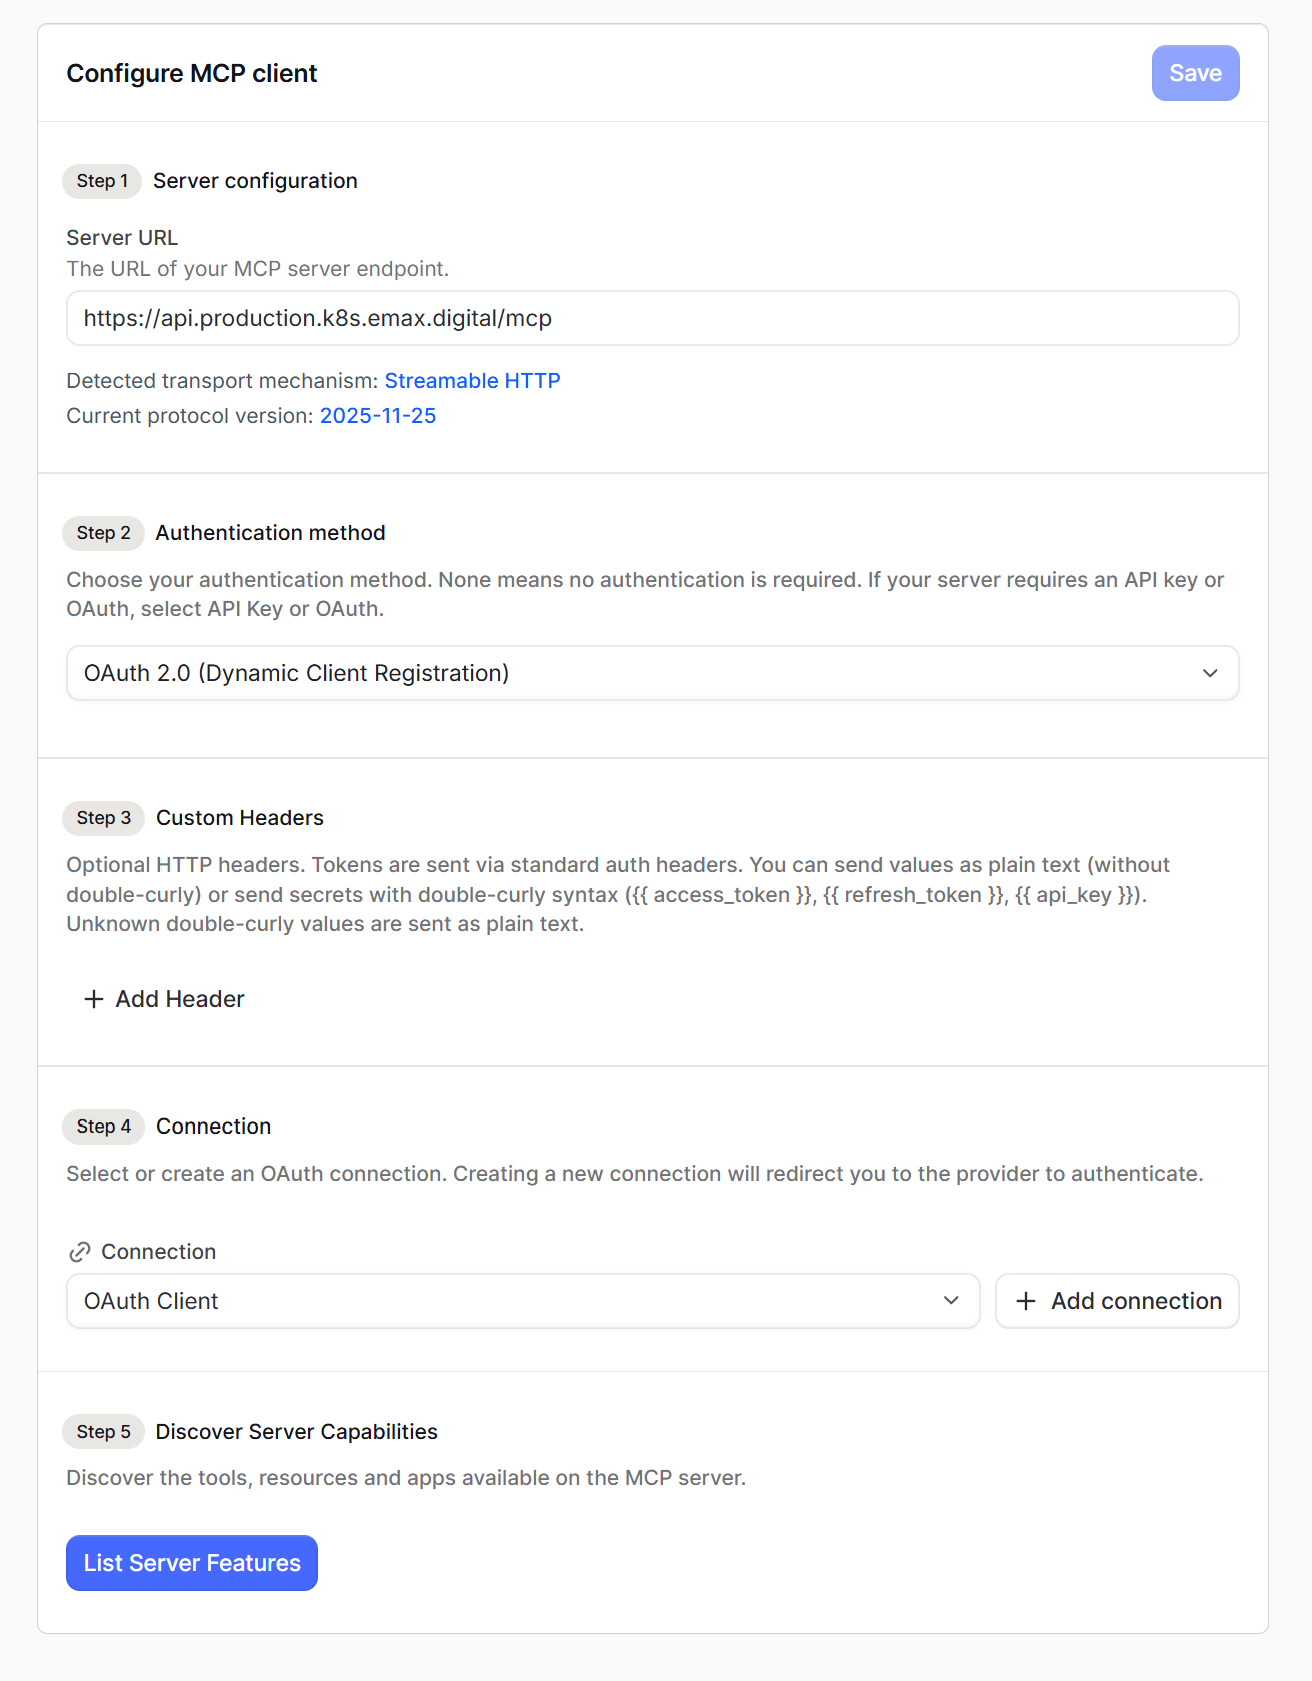
In the Add integration dialog, select the type Connect remote MCP and fill in the values below, then click Create and connect.
|
Field |
Value |
|---|---|
|
Type |
Connect remote MCP |
|
Server URL |
|
|
Authentication method |
OAuth 2.0 (Dynamic Client Registration) |
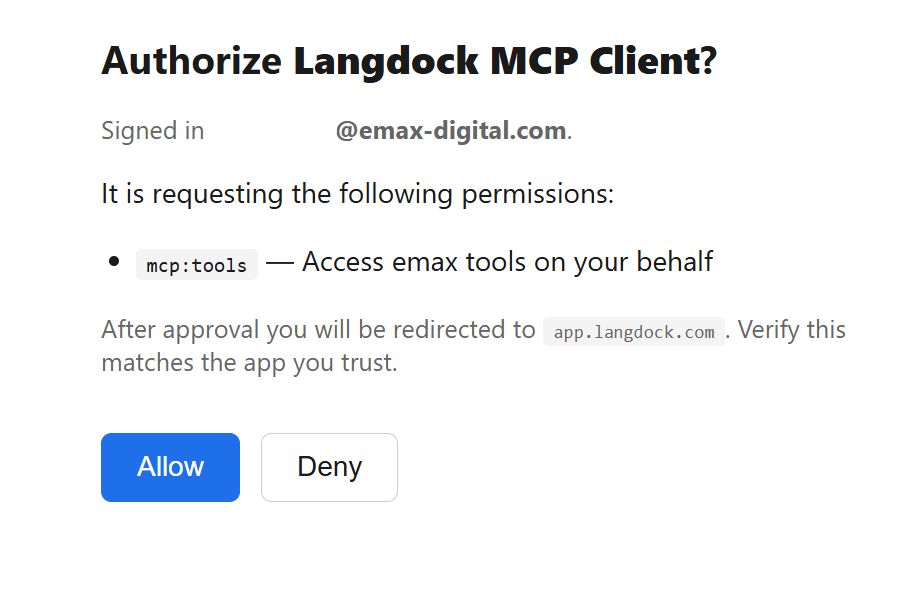
Step 4 · Authorize the connection
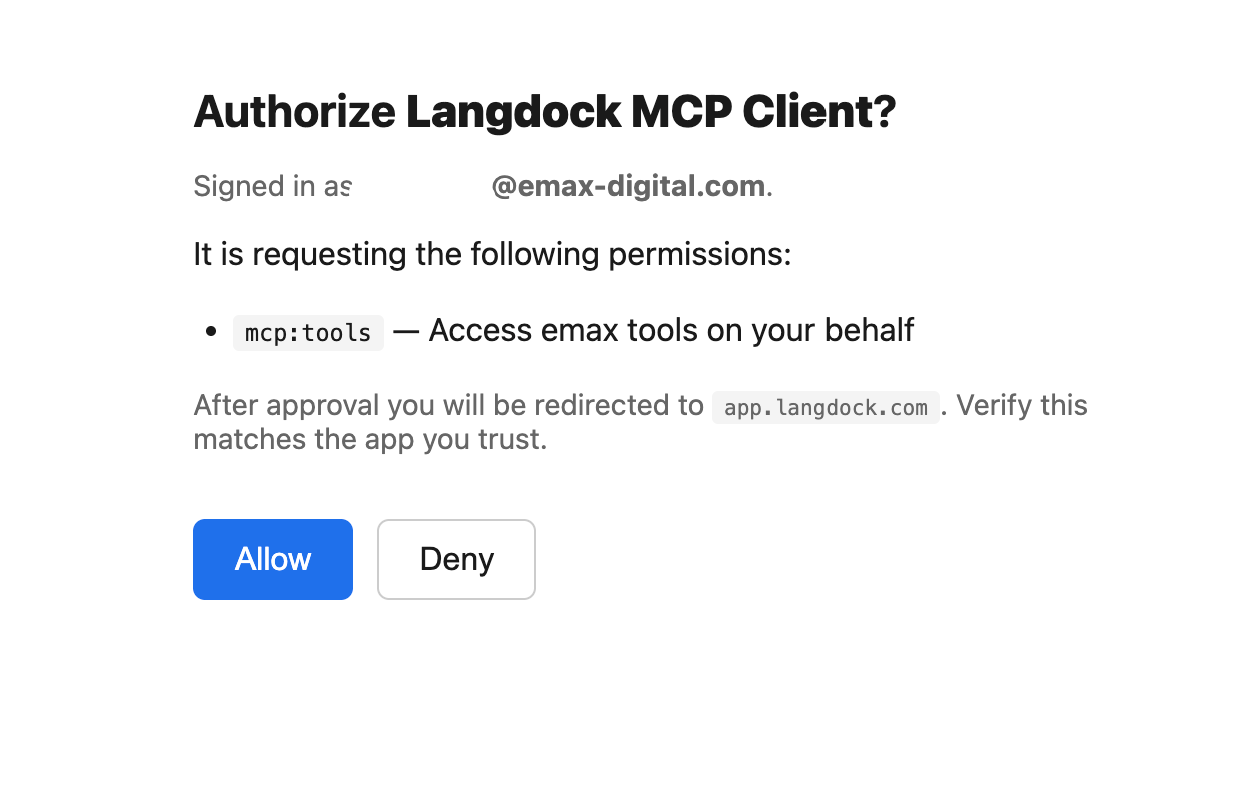
Langdock redirects you to the emax digital login. Sign in, then confirm the Authorize Langdock MCP Client screen by clicking Allow. The requested permission is mcp:tools — access emax tools on your behalf.
Give the integration a clear name, description and logo so your users recognise it in the plugin list. We recommend the name emax digital MCP.
Step 5 · Discover and enable the server features
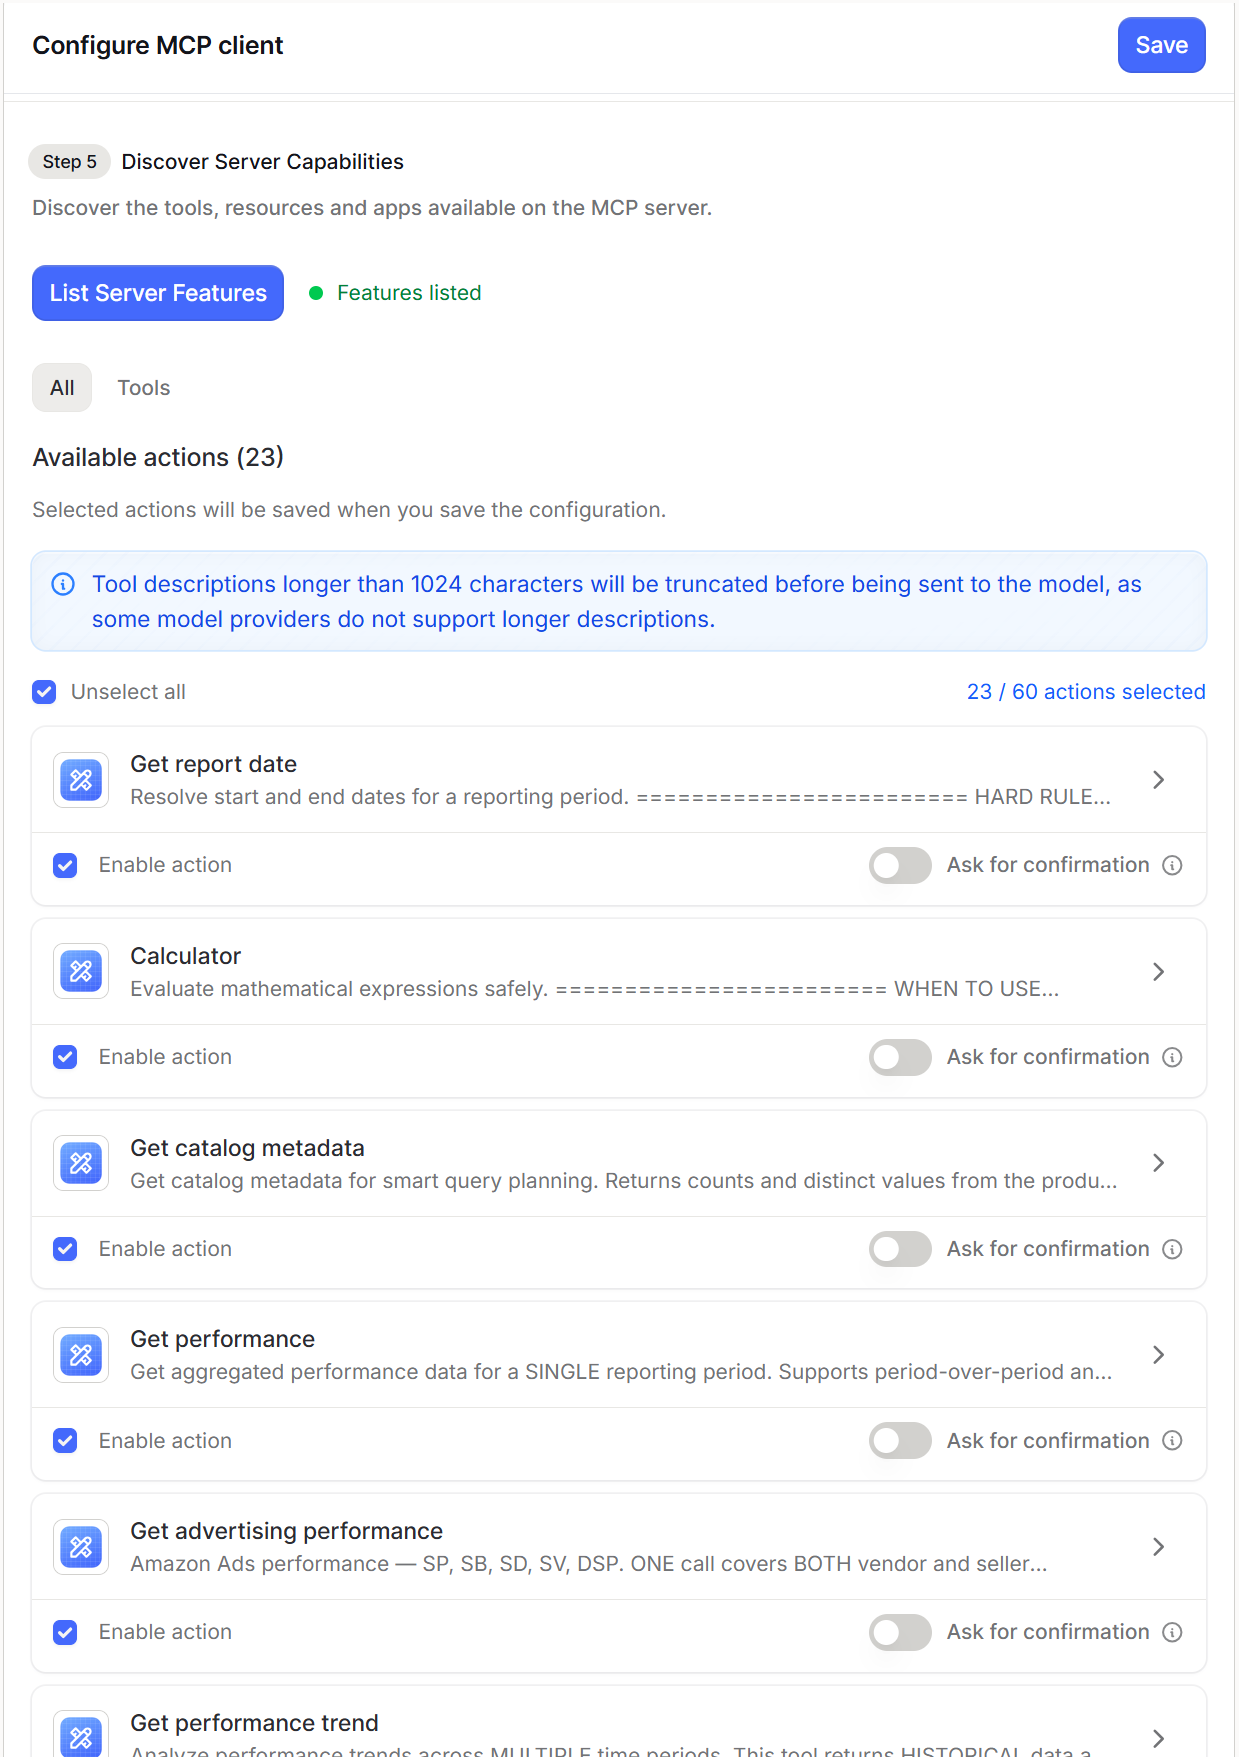
In Configure MCP client, go to Step 5 · Discover Server Capabilities and click List Server Features. We recommend selecting all actions, then click Save. You can deselect individual actions later if your organization wants a narrower scope.
Step 6 · Share the integration
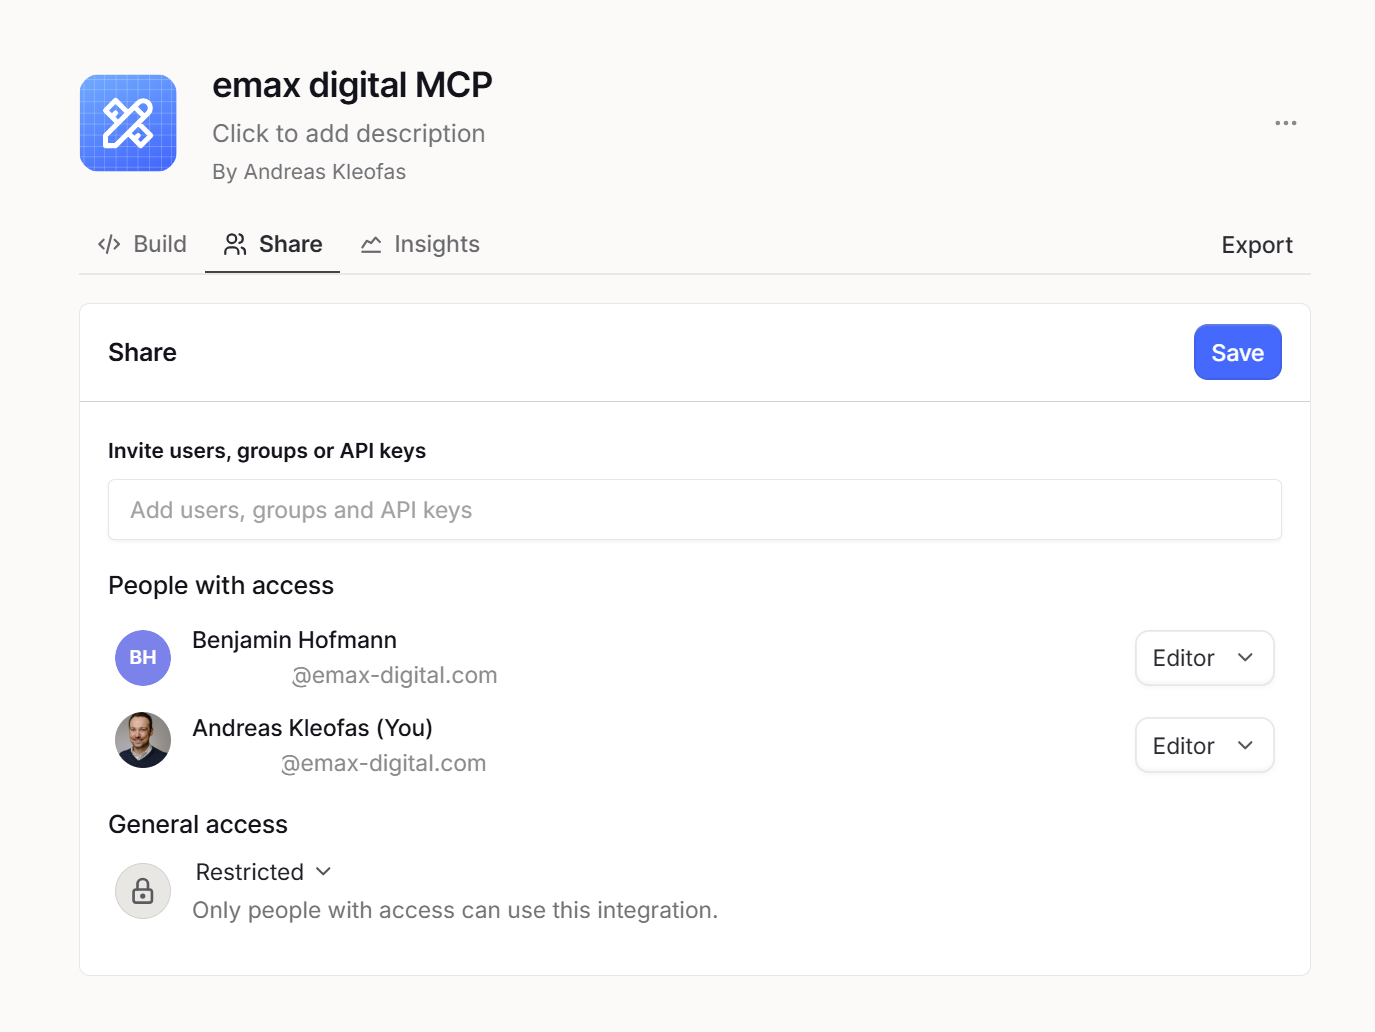
Open the Share tab. A newly created integration is set to Restricted — only people with explicit access can use it. Either invite specific users and groups, or change General access so everyone in your workspace can use the integration. Click Save.
The emax digital MCP is now available to the users you shared it with. Each of them still needs to connect it to their own account (Phase 2).
Phase 2 — Individual setup (each user)
Step 7 · Connect the plugin to your account
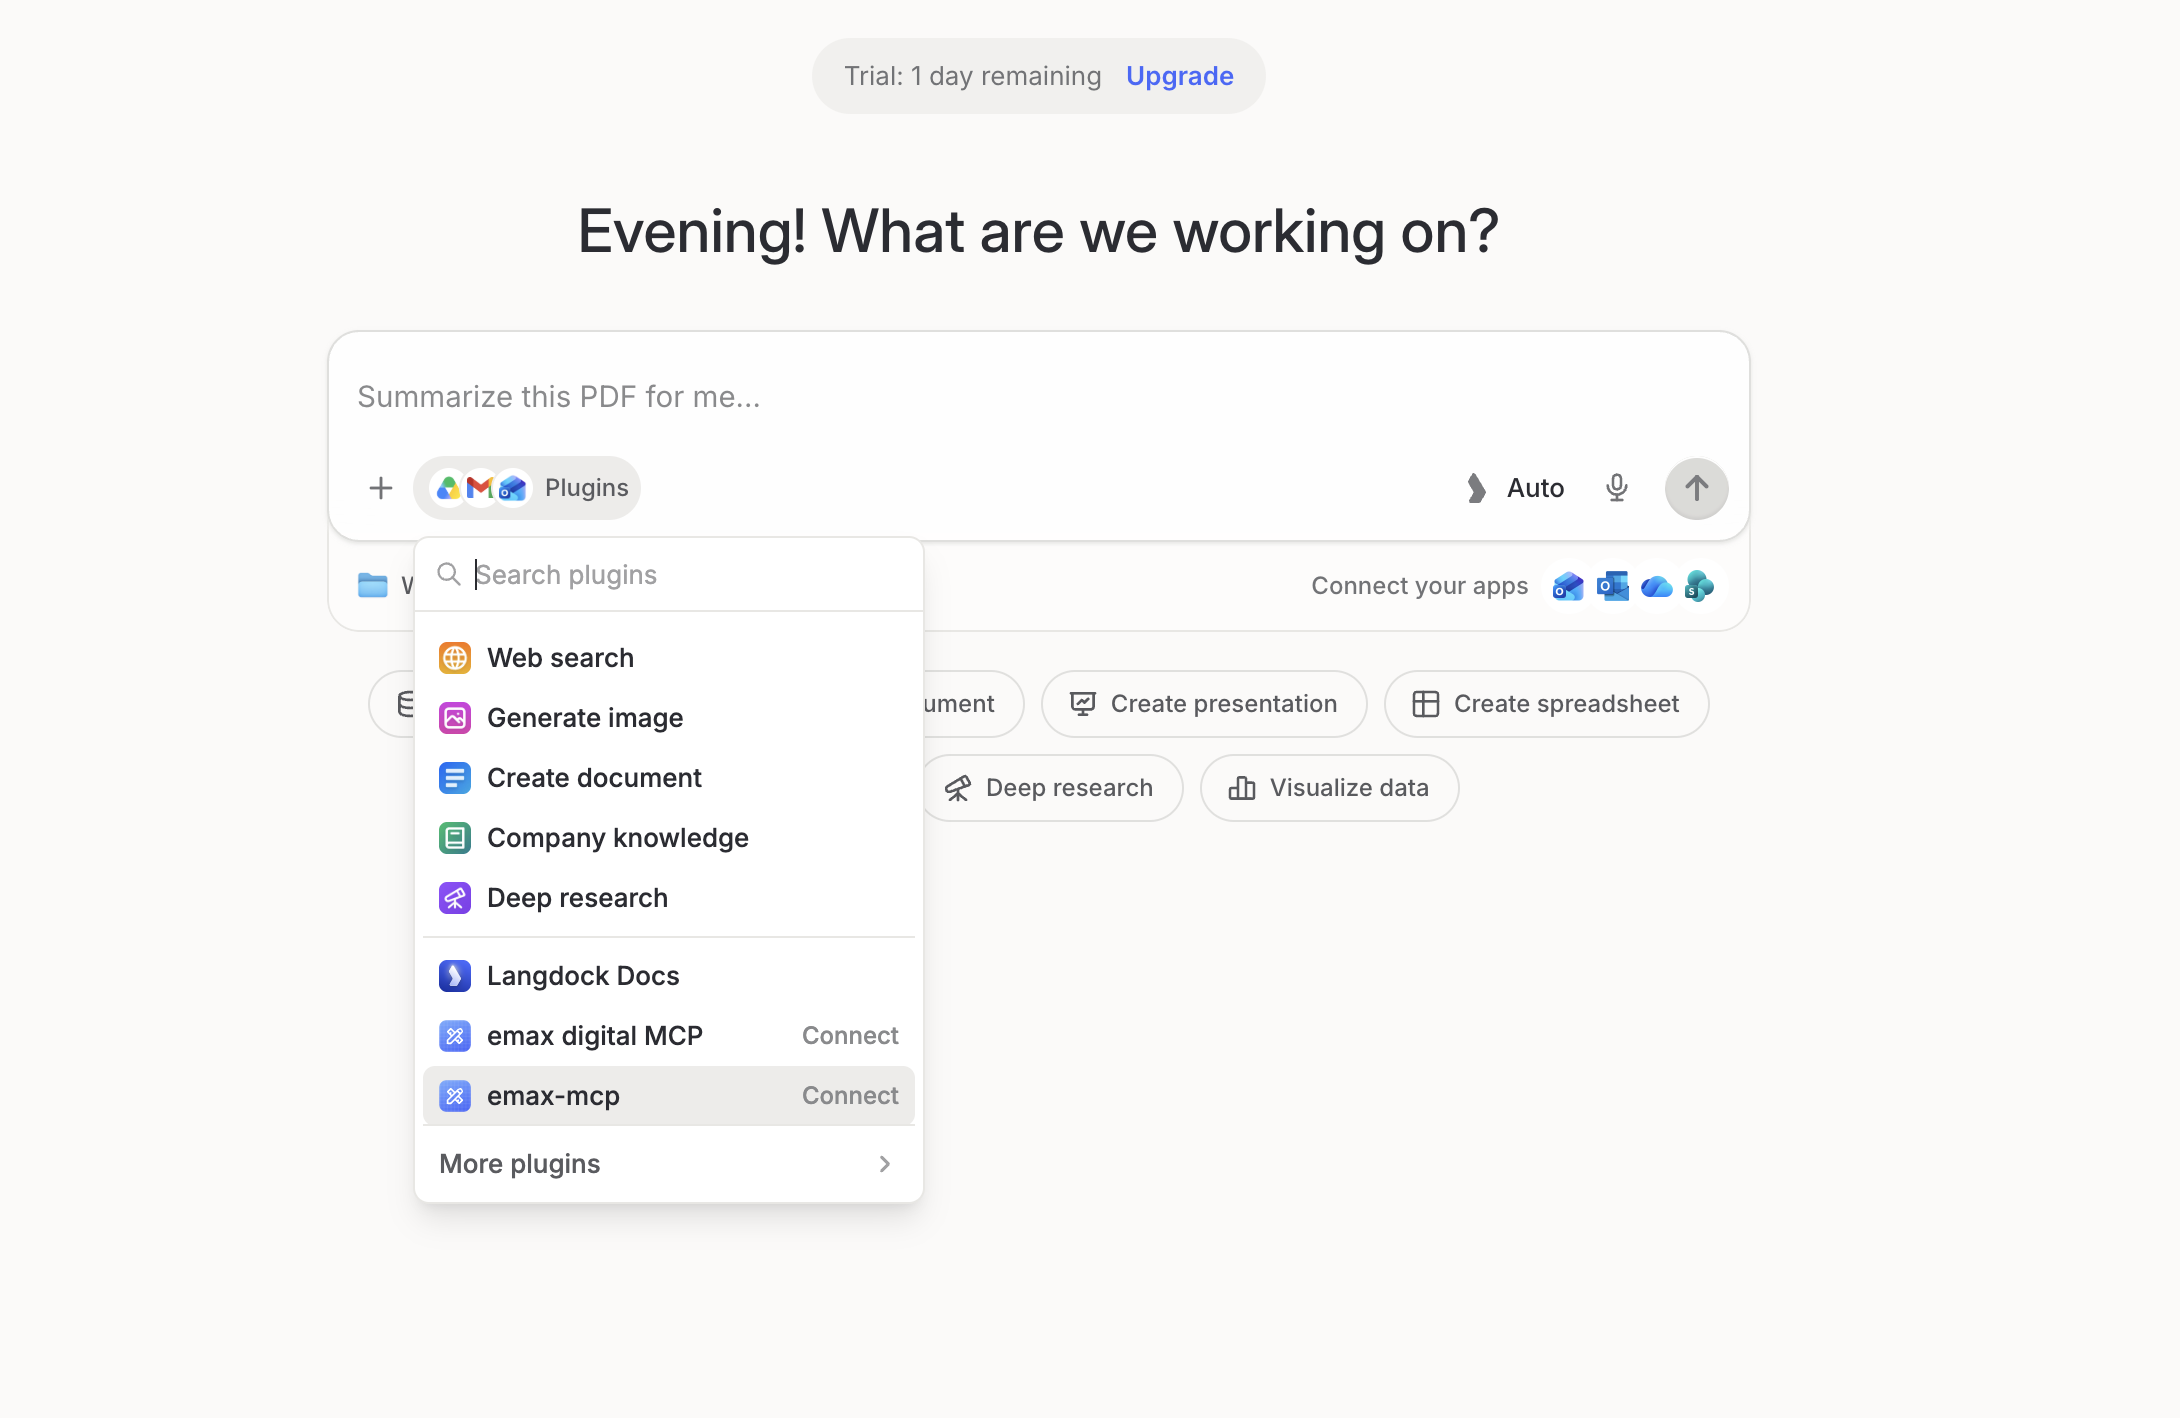
In a new chat, click Plugins, find emax digital MCP in the list and click Connect. You can also do this from your settings page.
Sign in with your own emax digital account and click Allow.
Step 8 · Start asking questions
Select emax digital MCP in the chat input and ask your question in natural language, for example: "Check last week's sales performance in Germany for company X."
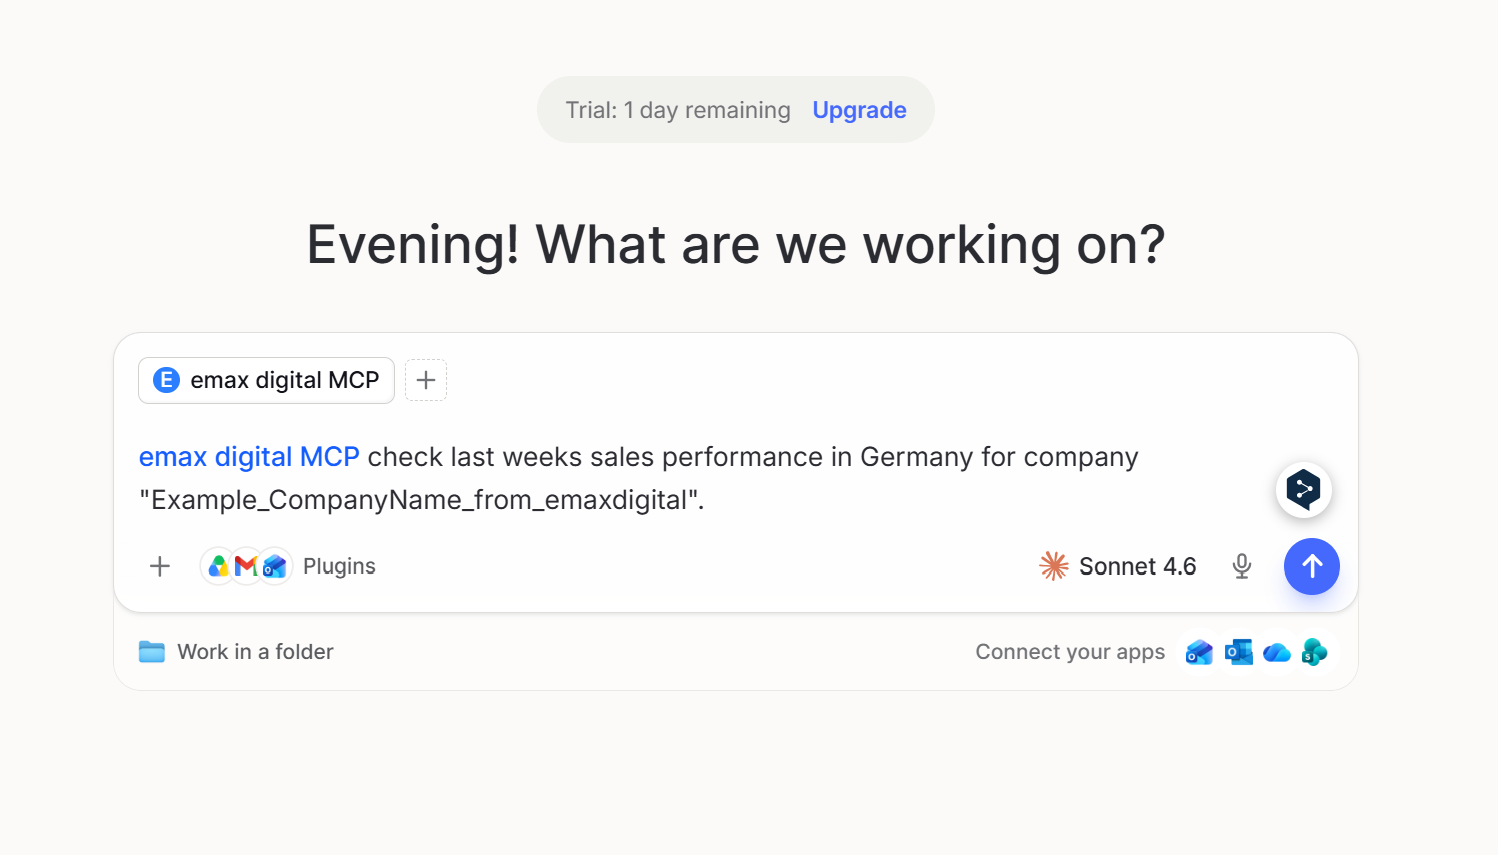
Setup complete. You can now ask Amazon analytics questions in natural language in Langdock, scoped to your authorized accounts.
Verifying the connection
Once connected, confirm everything works by asking a simple question, for example "Which Amazon accounts can I access?" If you get a relevant answer scoped to your authorized accounts, the integration is working. If you are prompted to sign in, complete the emax digital login and try again.
💡 Do you think the content on this page needs improvement? Let us know at support@emax-digital.com